Burn Away Cake Timer
Burn Away Cake Timing Tool
Get precise timing for your burn away cake's critical broiler step
How to Use
1. Select your oven type
2. Press Start Timer
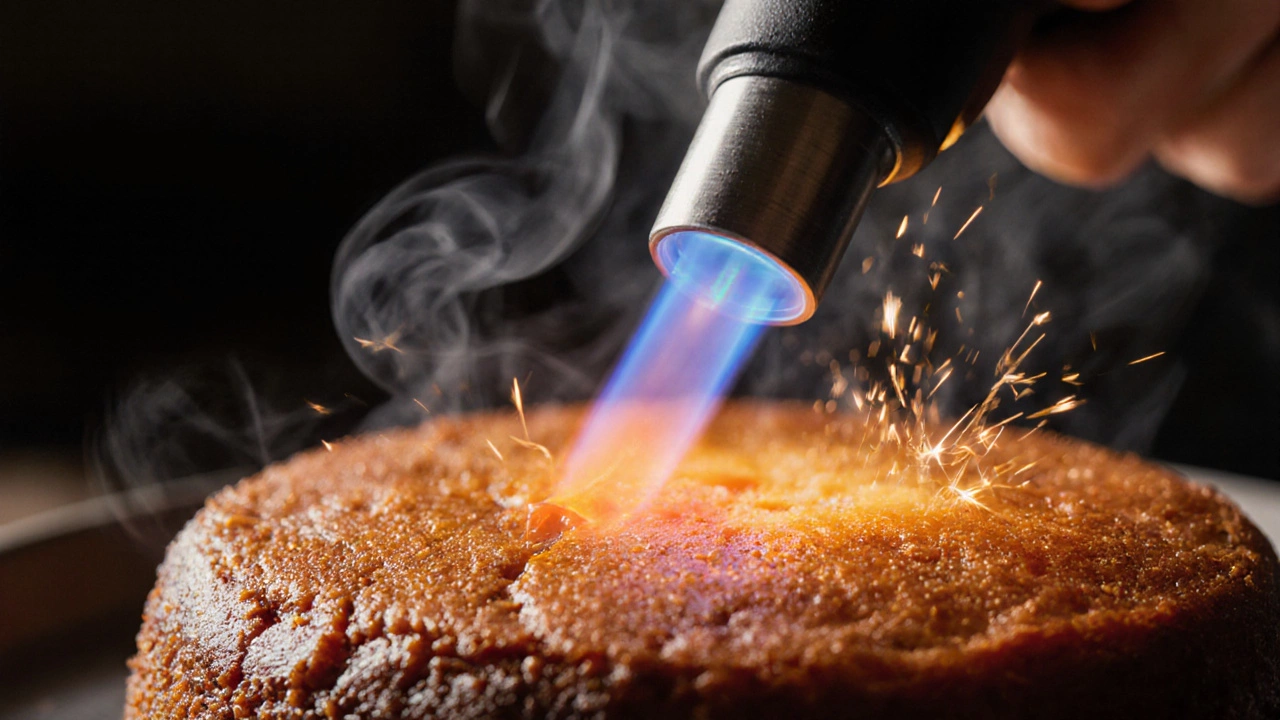
3. Watch the color change from golden to deep amber
4. Remove the cake immediately when you see a deep amber crust
When you hear burn away cake is a dessert that starts as a soft, moist cake and, after a short high‑heat blast, develops a crisp, caramelized “burnt” crust while the interior stays tender, you might picture a science‑experiment dessert. In reality, it’s a clever technique that lets you serve a warm, freshly‑baked cake with a dramatic, slightly smoky finish without over‑cooking the middle.
How the Burn‑Away Process Works
The magic lies in rapid surface caramelization. When a cake is baked at a normal temperature (around 350°F/180°C) the heat penetrates evenly, giving a uniform crumb. For a burn away cake, you finish the bake with a burst of intense heat-usually from a broiler, a kitchen torch, or a super‑hot oven setting. This sudden heat drives the Maillard reaction and sugar caramelization on the outer layer, forming a thin, crunchy crust that “burns away” any excess moisture on the surface.
Because the high heat only contacts the outer millimetres, the interior remains at the original doneness level. The result is a contrast of textures that feels both warm and fresh, almost like biting into a just‑out‑of‑the‑oven slice that’s been given a professional finish.
Core Ingredients & Essential Equipment
- flour - a standard all‑purpose flour works best for a tender crumb.
- sugar - provides sweetness and fuels the caramelized crust.
- butter - adds richness and helps the crust brown evenly.
- baking powder - gives the cake lift without creating a dense texture.
- eggs - bind the batter and trap air for a light rise.
- oven - a conventional oven for the base bake, then a broiler or torch for the final blast.
- heat‑resistant pan - such as a metal cake tin or a cast‑iron skillet that can handle high‑heat exposure.
- buttercream - optional frosting that can be spread after the crust forms; its fat helps protect the crumb from drying out.
- fondant - another decorative layer used by some bakers; it melts slightly under the broiler, creating a glossy finish.
- caramelization - the chemical process that turns sugars brown and gives the crust its signature crunch.
Step‑by‑Step Burn Away Cake Recipe
- Preheat your oven to 350°F (180°C). Grease a 9‑inch (23cm) round cake pan and line the bottom with parchment.
- In a bowl, whisk together 1½cups (190g) flour, 1tsp baking powder, and a pinch of salt.
- In a separate large bowl, cream ½cup (115g) softened butter with 1cup (200g) granulated sugar until pale and fluffy (about 3‑4minutes).
- Add 2 large eggs one at a time, beating well after each addition. Mix in 1tsp vanilla extract.
- Alternate adding the dry mix and ½cup (120ml) milk, beginning and ending with the dry mix. Stir just until combined; over‑mixing will make the crumb tough.
- Pour the batter into the prepared pan, smoothing the top with a spatula.
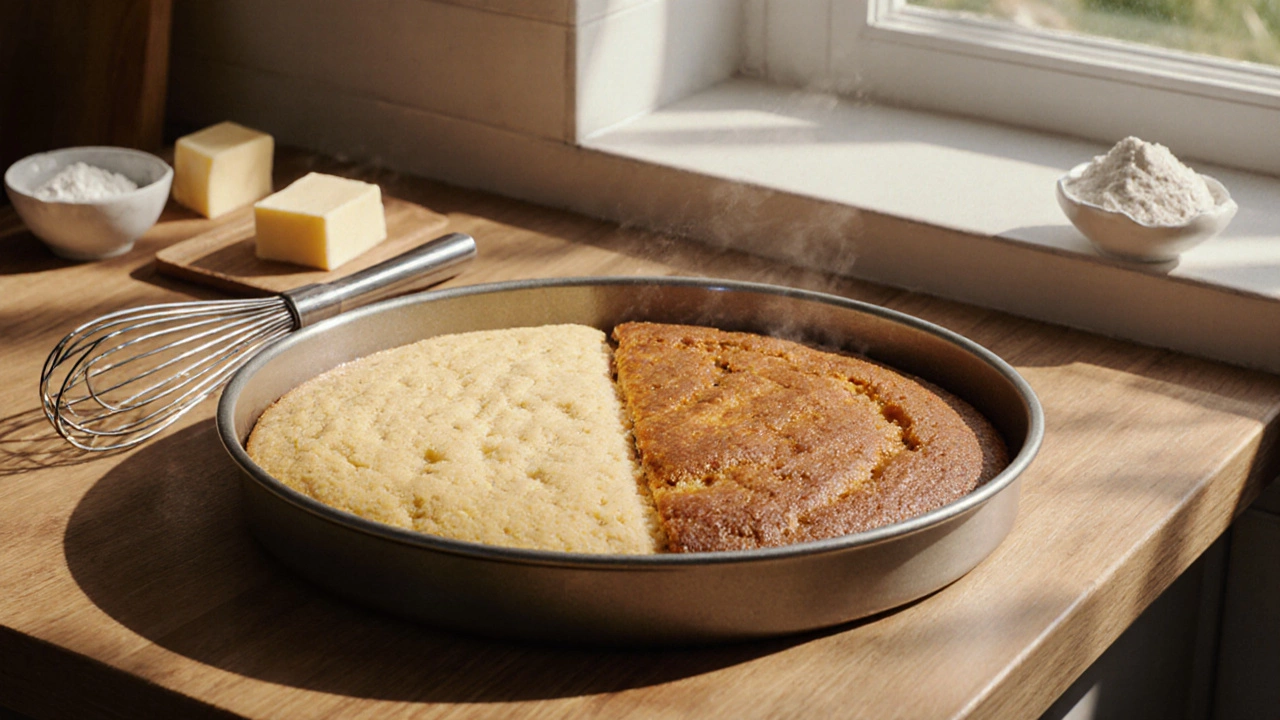
- Bake for 25‑30minutes, or until a toothpick inserted in the centre comes out clean. The cake should be lightly golden but not dark.
- While the cake is still hot, turn on the broiler to its highest setting. Place the pan on the top rack, keeping the door slightly ajar for safety.
- Watch closely! In 30‑60seconds the surface will begin to brown and crack. When you see a deep amber crust forming, remove the pan immediately to avoid burning.
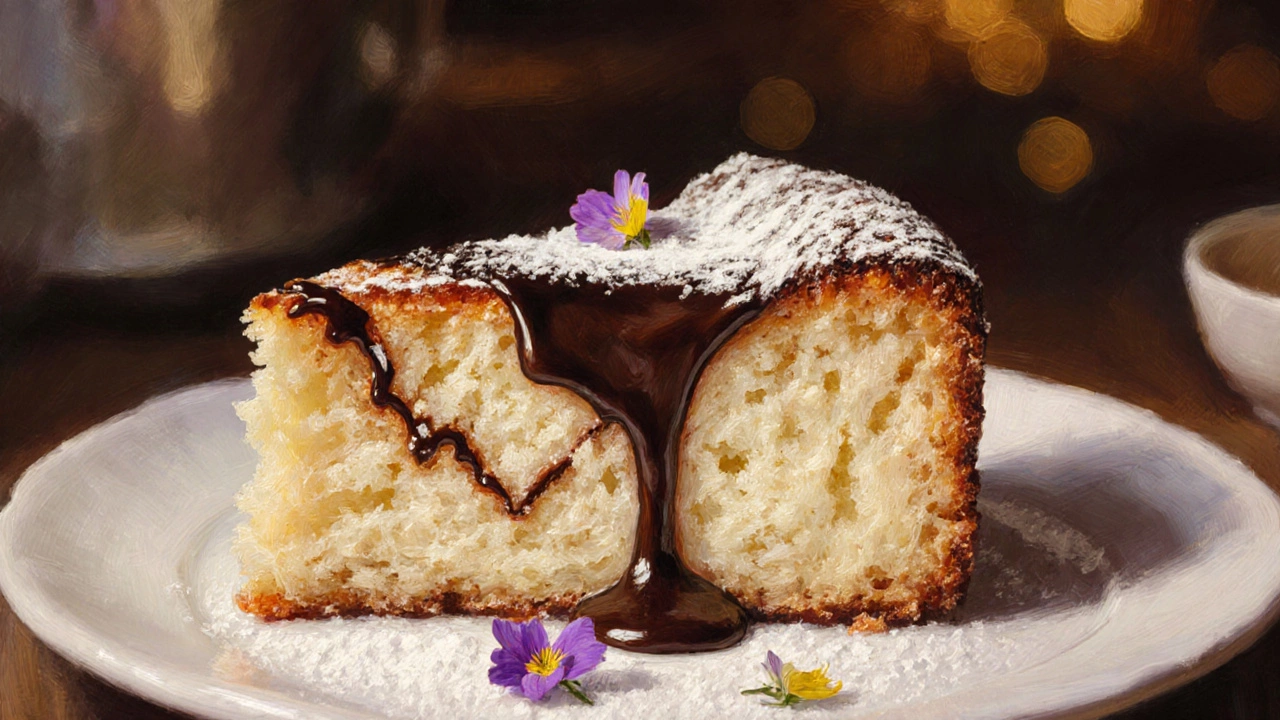
- If you like a frosting layer, spread a thin coat of buttercream while the cake is still warm. The heat will set the frosting slightly, giving a seal that locks in moisture.
- Let the cake cool on a wire rack for 10minutes, then transfer to a serving plate. Slice and enjoy the contrast of crispy crust and soft interior.
Decorating & Finishing Techniques
After the burn‑away step, you can get creative without compromising the crust.
- Fresh fruit glaze: Brush a thin layer of apricot jam mixed with warm water over the top for shine.
- Dusting: Lightly sift powdered sugar or cocoa powder for an elegant look.
- Chocolate drizzle: Melt dark chocolate and drizzle in a zig‑zag pattern; the residual heat will give it a glossy finish.
- Edible flowers: Place small petals on the crust after it cools; they add color without sogging the cake.
Common Issues & Troubleshooting
| Problem | Likely Cause | Solution |
|---|---|---|
| Crust stays pale | Broiler not hot enough or too short a blast | Increase broiler temperature, move pan closer to heat source, and watch for 30‑60 seconds longer. |
| Interior over‑cooked | Base bake time too long | Test with a toothpick 5 minutes before the stated time; pull out early if done. |
| Crust becomes bitter | Burned sugar (over‑caramelization) | Reduce broiler exposure; remove pan the moment you see a deep amber hue, not black. |
| Crust cracks excessively | Too much moisture on surface before blast | Pat the top with a paper towel after base bake, then proceed to broiler. |
Variations & Creative Ideas
Once you’ve mastered the basic technique, experiment with flavors and shapes.
- Chocolate version: Replace ¼ cup of flour with cocoa powder and add ¼ cup melted chocolate to the batter.
- Citrus twist: Add zest of lemon or orange to the batter; finish with a glaze of citrus juice and sugar.
- Mini burn‑away cupcakes: Use a muffin tin; the broiler step takes only 15‑20 seconds per batch.
- Savory spin: Swap sugar for cheese, herbs, and a pinch of smoked paprika; the burn‑away step gives a crispy, caramelized cheese crust.
Quick Comparison: Burn Away Cake vs. Regular Cake
| Attribute | Burn Away Cake | Regular Cake |
|---|---|---|
| Texture contrast | Crisp caramelized crust + soft interior | Uniform crumb throughout |
| Cooking steps | Standard bake + high‑heat finish | Single bake cycle |
| Decoration timing | Frost after crust forms to lock moisture | Frost once completely cooled |
| Shelf life | Crust may soften after 2‑3 days; best served fresh | Typically stable for up to a week |
| Difficulty | Intermediate - requires quick broiler timing | Beginner‑friendly |
Frequently Asked Questions
What exactly is a burn away cake?
It is a cake that undergoes a normal bake followed by a very brief, high‑heat blast that caramelizes the surface, creating a thin, crunchy crust while keeping the interior soft.
Do I need special equipment?
A standard oven with a broiler setting or a kitchen torch is enough. A heat‑resistant pan and a timer are helpful but not mandatory.
Can I use the technique with gluten‑free batter?
Yes. Replace all‑purpose flour with a gluten‑free blend that contains a binder (e.g., xanthan gum). The caramelization works the same way.
How long should the broiler be on?
Usually 30‑60 seconds, depending on your broiler’s intensity. Watch the color change from golden to deep amber and pull the cake out immediately.
Will the crust get soggy if I frost the cake?
Apply a thin layer of buttercream while the cake is still warm; the heat sets a slight seal that helps keep the crust crisp.
Give the burn away cake a try the next time you want a show‑stopping dessert with minimal fuss. The technique adds visual drama and mouth‑feel contrast that ordinary cakes can’t match, and with the basic recipe above you can start experimenting right away.